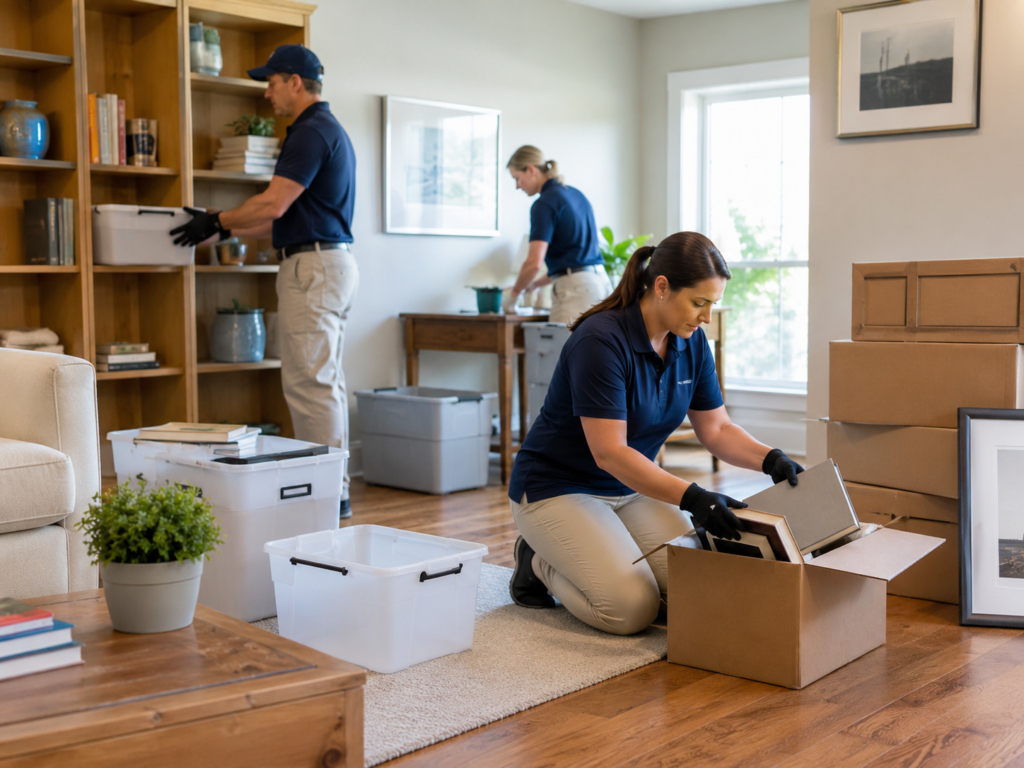
Many families have never managed an estate cleanout before. The process can involve far more than removing unwanted belongings from a home.
Before anything leaves the property, the family may need to locate important documents, protect sentimental items, identify belongings worth selling, coordinate donations, arrange recycling, and confirm what has been approved for disposal.
A well-organized estate cleanout follows a clear sequence. The goal is to protect what matters, reduce unnecessary waste, and prepare the property for its next step without creating avoidable stress or confusion.
An Estate Cleanout Is More Than Junk Removal
A basic junk-removal project usually begins after the customer has already decided what should be removed.
An estate cleanout often begins much earlier.
The family may still be determining:
- What belongs to whom
- Which items should remain with the family
- What may have resale value
- Which documents must be protected
- What can be donated
- What requires special disposal
- Whether the property will be sold, occupied, rented, or transferred
- Who has authority to approve decisions
Because of this, estate cleanouts often include a planning and sorting phase before physical removal begins.
Confirm Who Can Approve the Work
Before belongings are sold, donated, or discarded, confirm who is authorized to make decisions.
That person may be:
- The homeowner
- A surviving spouse
- A personal representative or executor
- A trustee
- Someone with valid power of attorney
- Another person authorized through the estate process
Family members may be emotionally involved without having legal authority to dispose of property.
When ownership or decision-making authority is unclear, pause before removal and consult an estate attorney.
Great Lakes Estate Co. does not provide legal advice, but we can coordinate our work with the authorized representative and the family’s legal professionals.
Step 1: Initial Consultation
The process begins with a conversation about the property and the family’s situation.
Topics may include:
- Property location
- Home size
- Household contents
- Garage, basement, attic, or outbuildings
- Family priorities
- Important deadlines
- Whether relatives live out of state
- Whether items may need to be sold
- Whether the property is being prepared for sale
- Known safety or access concerns
- The amount of sorting already completed
This helps determine whether the family is ready for a cleanout or needs organization and review services first.
Step 2: Property Walkthrough
A walkthrough helps define the scope of the project.
The property may be reviewed for:
- Approximate volume of contents
- Furniture and large items
- Documents or valuables requiring protection
- Potentially saleable items
- Donation opportunities
- Recycling needs
- General disposal
- Hazardous or restricted materials
- Access limitations
- Stairs, elevators, or long carrying distances
- Outdoor items
- Garages, sheds, and storage areas
- Property conditions that may affect the work
Photographs can help document the starting condition and support communication with out-of-state family members.
A walkthrough is not a licensed home inspection. Structural, electrical, plumbing, environmental, or other technical concerns should be referred to qualified professionals.
Step 3: Protect Important Belongings
Before removal begins, the family should locate and secure items that must not leave the property.
These may include:
- Wills and trust documents
- Property deeds
- Vehicle titles
- Insurance records
- Bank and investment statements
- Tax records
- Social Security documents
- Military records
- Family photographs
- Letters and journals
- Jewelry
- Coins and currency
- Artwork
- Antiques
- Collectibles
- Digital devices
- Password records
- Family heirlooms
- Medication
- Firearms and ammunition
Create a clearly marked area such as:
Do Not Remove — Family Review
Nothing in that area should be sold, donated, or discarded without approval.
Step 4: Sort the Household Contents
A simple sorting system keeps the project organized.
Keep
Items staying with the homeowner or family.
Family Review
Items requiring additional discussion.
Sell
Belongings approved for estate sale, auction, consignment, marketplace listing, specialist referral, or direct sale.
Donate
Usable items approved for charitable donation.
Recycle
Materials accepted by appropriate recycling programs.
Dispose
Damaged, unsafe, unusable, or non-donatable items approved for removal.
Use labels, colored tape, designated rooms, or separate storage areas to prevent categories from becoming mixed.
Step 5: Allow Family Members to Make Selections
When several relatives are involved, establish a clear review process.
Helpful practices include:
- Photographing important items
- Creating a shared digital album
- Setting a deadline for family selections
- Documenting who receives each item
- Identifying who is responsible for pickup or shipping
- Keeping valuable or sentimental items separate
- Designating one primary decision-maker
Without a deadline, family-review decisions can delay the entire cleanout.
Out-of-state relatives can often participate through photographs, video calls, and written approvals rather than traveling to the property multiple times.
Step 6: Review Potentially Valuable Items
Some belongings deserve closer review before they are placed into donation or disposal categories.
Potential categories include:
- Jewelry and watches
- Coins and precious metals
- Artwork
- Antiques
- Collectibles
- Sterling silver
- Designer items
- Musical instruments
- Rare books
- Tools and equipment
- Vintage furniture
- Military memorabilia
- Vehicles
- Specialized collections
Not every old item is valuable, and not every valuable item looks important.
When appropriate, the family may consult:
- Auctioneers
- Appraisers
- Jewelers
- Coin dealers
- Art specialists
- Antique dealers
- Consignment providers
- Category-specific buyers
Great Lakes Estate Co. can help identify items that may warrant additional research or specialist referral, but we do not provide formal appraisals.
Step 7: Coordinate the Sale of Approved Items
Saleable items should be addressed before the final cleanout whenever possible.
Potential sales channels include:
- Traditional estate sales
- Online auctions
- Specialty auction houses
- Consignment
- Marketplace listings
- Direct buyers
- Dealer purchases
- Bulk liquidation
The best method depends on:
- Item type
- Condition
- Volume
- Buyer demand
- Available time
- Property access
- Fees
- Pickup logistics
- Expected net proceeds
Trying to sell every household item individually can delay the property and create more work than value.
A practical sales plan focuses on belongings whose likely return justifies the effort.
Step 8: Coordinate Donations
Usable items may be appropriate for donation.
Possible categories include:
- Clothing
- Furniture
- Kitchenware
- Household goods
- Books
- Linens
- Small appliances
- Tools
- Medical equipment
- Building materials
Donation organizations may have specific restrictions.
Before scheduling, confirm:
- What items are accepted
- Condition requirements
- Whether pickup is available
- How far in advance pickup must be arranged
- Furniture restrictions
- Whether items must be moved outside
- Whether donation receipts are provided
- What happens to declined items
Donation is most effective when it is planned rather than treated as a last-minute solution.
Step 9: Separate Recycling and Special-Handling Items
Certain materials should not go into ordinary household disposal loads.
These may include:
- Electronics
- Televisions
- Computers
- Batteries
- Scrap metal
- Appliances
- Paint
- Chemicals
- Fluorescent bulbs
- Propane cylinders
- Tires
- Medical sharps
- Documents requiring shredding
- Fuel
- Pesticides
- Compressed-gas containers
Local rules and facility hours may affect how these items are handled.
Identifying them early helps prevent delays on the final cleanout day.
Step 10: Define the Cleanout Scope
Before crews arrive, the family and provider should agree on what is included.
A written scope may identify:
- Rooms to be cleared
- Items that must remain
- Furniture removal
- Appliance removal
- Garage and basement contents
- Attic contents
- Outdoor items
- Outbuildings
- Donation responsibilities
- Recycling
- General disposal
- Special-handling items
- Final sweeping or basic cleanup
- Items excluded from the project
Clear expectations reduce misunderstandings and change-order disputes.
Step 11: Schedule the Physical Cleanout
The physical cleanout may take one day or several working days depending on:
- Property size
- Volume of contents
- Access
- Crew size
- Stairs
- Heavy items
- Disposal requirements
- Donation schedules
- Weather
- Safety conditions
- Distance to disposal facilities
A small apartment may be completed quickly.
A multi-level home with decades of belongings, several outbuildings, and multiple disposition categories may require a phased project.
What Happens During the Cleanout?
During active removal, the crew generally works through the property according to the approved scope.
The process may include:
- Confirming protected areas
- Removing approved furniture
- Loading donation items separately
- Separating recyclables
- Handling approved disposal items
- Clearing garages and storage areas
- Removing exterior debris
- Checking drawers and compartments
- Keeping walkways safe
- Documenting unexpected discoveries
- Confirming changes with the decision-maker
- Completing a final walkthrough
Items should not be removed from protected or family-review areas without approval.
What If Important Items Are Found During Removal?
Unexpected discoveries are common.
A crew may find:
- Cash
- Jewelry
- Family photographs
- Legal documents
- Medications
- Firearms
- Personal identification
- Valuable collections
- Hidden storage areas
- Locked boxes
- Digital devices
The project should have a clear procedure for stopping, documenting, and securing anything important.
This is another reason to use a provider experienced with estate transitions rather than treating the project as ordinary debris removal.
How Long Does the Process Take?
The physical cleanout may take:
- Small apartment or partial cleanout: approximately 1–2 days
- Average household: approximately 2–5 working days
- Large or heavily furnished property: approximately 1–3 weeks
- Complex multi-phase estate: several weeks or longer
The full process may take longer than the physical removal because it can include:
- Family decisions
- Legal authorization
- Sorting
- Item sales
- Donation scheduling
- Specialist review
- Repairs
- Cleaning
- Property preparation
A three-day cleanout may still require several weeks of coordination beforehand.
Multi-Phase Cleanouts
Some properties should not be cleared all at once.
A practical sequence may be:
Phase 1: Documents and Valuables
Protect legal papers, personal records, photographs, jewelry, and important belongings.
Phase 2: Family Distribution
Allow relatives to identify, collect, or arrange shipping for approved items.
Phase 3: Sales
Coordinate auction, estate sale, marketplace, consignment, or specialist referrals.
Phase 4: Donations and Recycling
Remove usable and recyclable items through appropriate providers.
Phase 5: Final Cleanout
Remove remaining approved household contents.
Phase 6: Property Preparation
Coordinate cleaning, repairs, yard work, and readiness for the home’s next step.
A phased approach may take longer on the calendar, but it often protects more value and reduces mistakes.
What Happens After the Cleanout?
Once the contents are removed, the property may still need:
- Deep cleaning
- Carpet cleaning
- Odor treatment
- Paint touch-ups
- Minor repairs
- Yard cleanup
- Lock changes
- Appliance removal
- Utility coordination
- Vendor access
- Final property documentation
- Sale preparation
The next step depends on whether the property will be:
- Listed for sale
- Occupied by a family member
- Rented
- Renovated
- Transferred
- Secured for a future decision
Completing the cleanout creates the visibility needed to evaluate the property more accurately.
How to Stay Organized
Helpful practices include:
- Use one primary family contact
- Keep decisions in writing
- Photograph important items
- Use labels or colored tape
- Maintain a shared project folder
- Set family deadlines
- Approve a written scope
- Keep donation receipts
- Document specialty disposal
- Photograph the property before and after
- Establish spending limits
- Create a final walkthrough checklist
Good documentation is especially important when family members live out of state.
Common Estate Cleanout Mistakes
Try to avoid:
- Renting a dumpster before reviewing the contents
- Throwing away unopened boxes
- Donating items before family approval
- Removing furniture without checking drawers
- Discarding documents without review
- Assuming every old item lacks value
- Trying to sell every low-value item
- Canceling utilities too early
- Scheduling cleaners before removal is complete
- Allowing multiple relatives to direct the crew
- Failing to identify hazardous materials
- Waiting until just before a closing date
- Having no plan for unsold items
A slower, organized beginning often produces a faster overall project.
How Much Does an Estate Cleanout Cost?
Cleanout pricing depends on factors such as:
- Volume of contents
- Labor
- Property access
- Number of floors
- Heavy items
- Disposal fees
- Equipment needs
- Travel
- Donation coordination
- Recycling
- Hazardous or restricted materials
- Timeline
- Additional services
A responsible estimate should be based on the property and approved scope rather than only the number of rooms.
Families should ask whether pricing includes:
- Labor
- Transportation
- Disposal
- Donation delivery
- Cleanup
- Heavy-item surcharges
- Appliances
- Specialty materials
- Additional loads
- Taxes or fees
A written estimate helps prevent surprises.
Great Lakes Estate Co. Can Help Coordinate the Entire Process
Great Lakes Estate Co. helps families manage estate cleanouts as part of a broader estate and property transition.
Depending on the project, support may include:
- Free initial consultation
- Estate organization and sorting
- Personal-property review
- Family-review coordination
- Sale and liquidation coordination
- Marketplace management
- Donation coordination
- Recycling and disposal
- Full or partial estate cleanouts
- Local support for out-of-state families
- Cleaning coordination
- Light-rehab coordination
- Vendor scheduling
- Property preparation
Our goal is to create one clear plan and keep the work moving in the right order.
Start With a Free Consultation
You do not need to have the home sorted before contacting us.
During a free consultation, we will learn about the property, household contents, family needs, and timeline. From there, we can help identify the most appropriate next step and determine which Great Lakes Estate Co. services may be useful.